Sliced bread was sold for the first time on
this date in 1928. Up until that time, consumers baked their own bread,
or bought it in solid loaves. Otto Frederick Rohwedder, a jeweler from
Davenport, Iowa, had been working for years perfecting an eponymous
invention, the Rohwedder Bread Slicer. He tried to sell it to bakeries.
They scoffed, and told him that pre-sliced bread would get stale and dry
long before it could be eaten. He tried sticking the slices together
with hatpins, but it didn't work. Finally he hit on the idea of wrapping
the bread in waxed paper after it was sliced. Still no sale, until he
took a trip to Chillicothe, Missouri, and met a baker who was willing to
take a chance. Frank Bench agreed to try the five-foot-long,
three-foot-high slicing and wrapping machine in his bakery. The
proclamation went out to kitchens all over Chillicothe, via ads in the
daily newspaper: "Announcing: The Greatest Forward Step in the Baking
Industry Since Bread was Wrapped — Sliced Kleen Maid Bread." Sales went
through the roof. Rohwedder not only gave Americans the gift of
convenience and perfect peanut butter and jelly sandwiches, but he also
provided the English language with the saying that expresses the
ultimate in innovation: "the greatest thing since sliced bread."
Wednesday, July 6, 2011
Tuesday, April 19, 2011
Passover Chocolate Orange Almond Tart with Almond Praline

This was so well received when I made it last year, Diane asked for a return performance for tonight's Passover Seder. For the purists, I guess you could substitute margarine for the butter, but that would be sad.
Adapted from Jenna Huntsberger's InTheMoment.
For the almond orange tart crust
6 oz almonds
1/4 cup sugar
2 tsp orange zest
5 tbs butter, melted
Butter a 9 inch tart pan with a removable bottom.
Preheat oven to 350°F. In a food processor, grind almonds with sugar and orange zest until coarsly ground. Add butter and process a couple pulses more, until the butter is evenly distributed (you may need to stir a couple times with a small spatula). Pat almond mixture into bottom and sides of tart pan. Bake for 10 minutes, until the nuts are lightly toasted, then remove to a rack to cool.
For the chocolate orange almond filling
1/2 cup butter
8 oz bittersweet chocolate
5 large eggs, separated
3/4 cups sugar
2 tbs orange juice
2 tsp orange zest
1 cup almond flour
[Since I don't have almond flour, I run 1 cup of Trader Joe's almond meal, 1/2 cup of the sugar, and the orange zest in the Cuisinart until finely ground.]
Leave oven on at 350°F.
Melt butter and chocolate in a small bowl in the microwave or over a double boiler, stirring occasionally. Let cool to room temperature.
Whisk egg yolks with sugar until until they become pale yellow. Whisk in cooled chocolate mixture until evenly combined. Whisk in orange juice, orange zest, and almond flour.
In the bowl of an electric mixer fitted with a whisk attachment, beat egg whites until they are stiff, but not dry. Fold 1/4 of whites into the chocolate mixture to lighten. Then fold in the remaining 3/4 egg whites, until evenly combined.
Pour filling into the almond tart shell and bake for 40 minutes, until the filling is puffed and set in the center. Remove to a rack to cool.
Because the egg whites will cause the filling to puff up irregularly, you will need to level the top of the tart before glazing. Use a serrated knife to slice a thin layer off the top of the tart to make an even, level surface. Brush off all crumbs.
For the almond praline

1 cup sugar
1 cup sliced almonds
Place a Silpat liner in a baking sheet.
In a heavy saucepan over medium heat, melt sugar until light gold, stirring with a fork until the sugar dissolves (it will clump, but just continue to stir to let it dissolve evenly). Let color to a deep caramel color, tilting pan to ensure all sugar is melted and browning evenly. Add the nuts and stir for one minute, until fragrant.
Immediately pour caramel mixture onto baking sheet, spreading with an offset spatula into a thin layer. Let cool, then peel off Silpat and break into irregular pieces.
For the chocolate glaze
6 oz bittersweet chocolate, chopped
6 tbs unsalted butter, softened
1/4 cup hot water (120°F)
In a small bowl melt the chocolate in the microwave on low power, stopping to stir every 30 seconds. Remove just before all the chocolate is melted and allow the residual heat to finish the melting process.
Add the butter, a tablespoon at a time, stirring until blended. If necessary, you can heat the chocolate/butter mixture gently in the microwave – but don’t let it get too hot, otherwise the butter will separate.
Add the hot water all at once and stir until combined. [I don't think this is necessary; this time I added about a tablespoon of water.]
Assemble the tart
Note: remember to level the top of the tart with a serrated knife before glazing.
Generously ladle the glaze over the top of the tart and use offset spatula to spread the glaze to the edges. Delicately place pieces of praline onto the glaze in a decorative, irregular pattern. Let glaze set for two hours.
Gently remove tart from pan and place on serving platter.
Sunday, February 20, 2011
Sourdough Bread
I've been making sourdough bread on and off for many years, using a starter I got from Boulette's Larder. I've been fairly successful using it with various permutations of no-knead bread (Mark Bittman - recipe, Cooks Illustrated). However, my absolute favorite bread is from Tartine Bakery. I got the original Tartine cookbook , which is wonderful, but the bread recipe was conspicuously absent. When I heard that Chad Robertson was coming out with a book dedicated to Tartine's bread
 , I preordered it, devoured it as soon as it arrived, and have been making 2 loaves of bread every weekend since then. As I've tweaked the recipe a bit, I wanted to document my current best effort.


Leaven
125 g water
50 g mature starter
50 g AP or bread flour
50 g white whole wheat flour (I use Trader Joe's or King Arthur but any whole wheat flour is fine)
Mix ingredients in bowl, cover with plastic wrap, and leave overnight on counter. The leaven should be nicely bubbly (it will even float).
Bread
750 g water (@ 80 degrees F) (about 3 1/2 cups)
200 g leaven
425 g AP flour
425 g bread flour (KA, Stone-Buhr)
150 g white whole wheat flour (Trader Joe's or King Arthur)
50 g rye flour
25 g Bob's Red Mill flaxseed meal
25 g milled flaxseed (from Costco)
50 g water
20 g salt
2 medium-size skillets (I use cast-iron size 5 and 6)
5-7 quart enameled cast-iron dutch oven (I use a Le Crueset knock-off)
Instructions
Mix the 750 grams of water and leaven in very large bowl, squeezing by hand to break up clumps. Save remaining leaven with old starter.
Combine flours and flaxseed in medium bowl and mix with large balloon wisk.
Add flour mixture to water and leaven, mixing until all of the flour is moistened.
Let sit for 30 minutes for autolyse. In the mean time, combine the last bit of water with the salt.
After the flour has hydrated, add the water and salt at once and squeeze with hands to combine and ensure that the water and salt are fully mixed in.
Turn oven on for 1 minute to warm to about 80 degrees to aid proofing.
Cover the bowl and transfer to slightly warm oven for initial bulk fermentation. Every 30 minutes, remove the bowl, grab one side of the dough, stretch up and then fold over the remaining dough. Rotate the bowl 90 degrees and repeat three more times. Cover and return to the oven. Continue this process for about 4 hours until the dough is soft, light, and bubbly.
Dump the dough out on counter or marble slab using a bowl scraper, then sprinkle flour on the dough mound. Using dough scraper, divide in half. Flip each portion of dough over and bring the sides together so all of the sticky dough is inside and the outside is covered with flour. Using the dough scraper and hands, form each portion into a taut ball and leave for 30 minutes for the bench rest.
For the final shaping, flip the first dough ball over, grab the bottom by the corners, stretch toward you, and fold over the middle third. Then grab each side and pull outward, stretching until taut. Fold right side over then left side over the middle. Finally, pull the side furthest away up and fold over then without letting go, use thumbs to fold bottom up and over, making a nice, tight ball. Use dough scraper to shape the ball and further tighten it. Repeat with second ball.
Line two medium-size cast iron saute pans with plastic wrap. Set the first ball top-side down in one of the pans. Cover with another piece of plastic wrap. Repeat with the second ball. Place both pans in the refrigerator for 8-20 hours.
The next day, take one of the pans out of the fridge and set on counter. Put 5-7 quart enameled dutch oven with lid in oven and heat to 500 degrees. After about 25 minutes, remove the plastic wrap from the top of the dough. Take a large sheet of parchment paper (about 16 inches square) and place on top of dough. With one hand on top of the parchment paper, carefully invert the pan and gently slide the dough to the counter. Pull off the other sheet of plastic wrap. With a razor blade or lame cut a pattern (X or square) into the top of the dough. Carefully remove the hot pot from the oven and set the top aside. Grab two corners of the parchment paper with each hand and carefully lower into the hot pot. If you have a water spritzer, give a quick squeeze over the dough and then cover the pot and carefully return the dutch oven to the oven. Immediately turn the oven down to 425 and bake for 25 minutes. Remove the top and bake for another 25 minutes.
When done, gently invert the bread from the pot onto a wire rack, remove the parchment paper and then turn top-side up to cool. Now cover the enameled cast-iron dutch oven, place back in the oven, returning the oven to 500 degrees and bring out the second cast-iron skillet and repeat (you should be able to reuse the parchment paper). Of course, if you have two dutch ovens you can bake both loaves at the same time. Let each loaf cool about 2 hours before slicing (if you can!).
Check out this great video about Tartine Bread.
Tartine Bread from 4SP Films on Vimeo.


Leaven
125 g water
50 g mature starter
50 g AP or bread flour
50 g white whole wheat flour (I use Trader Joe's or King Arthur but any whole wheat flour is fine)
Mix ingredients in bowl, cover with plastic wrap, and leave overnight on counter. The leaven should be nicely bubbly (it will even float).
Bread
750 g water (@ 80 degrees F) (about 3 1/2 cups)
200 g leaven
425 g AP flour
425 g bread flour (KA, Stone-Buhr)
150 g white whole wheat flour (Trader Joe's or King Arthur)
50 g rye flour
25 g Bob's Red Mill flaxseed meal
25 g milled flaxseed
50 g water
20 g salt
2 medium-size skillets (I use cast-iron size 5 and 6)
5-7 quart enameled cast-iron dutch oven (I use a Le Crueset knock-off)
Instructions
Mix the 750 grams of water and leaven in very large bowl, squeezing by hand to break up clumps. Save remaining leaven with old starter.
Combine flours and flaxseed in medium bowl and mix with large balloon wisk.
Add flour mixture to water and leaven, mixing until all of the flour is moistened.
Let sit for 30 minutes for autolyse. In the mean time, combine the last bit of water with the salt.
After the flour has hydrated, add the water and salt at once and squeeze with hands to combine and ensure that the water and salt are fully mixed in.
Turn oven on for 1 minute to warm to about 80 degrees to aid proofing.
Cover the bowl and transfer to slightly warm oven for initial bulk fermentation. Every 30 minutes, remove the bowl, grab one side of the dough, stretch up and then fold over the remaining dough. Rotate the bowl 90 degrees and repeat three more times. Cover and return to the oven. Continue this process for about 4 hours until the dough is soft, light, and bubbly.
Dump the dough out on counter or marble slab using a bowl scraper, then sprinkle flour on the dough mound. Using dough scraper, divide in half. Flip each portion of dough over and bring the sides together so all of the sticky dough is inside and the outside is covered with flour. Using the dough scraper and hands, form each portion into a taut ball and leave for 30 minutes for the bench rest.
For the final shaping, flip the first dough ball over, grab the bottom by the corners, stretch toward you, and fold over the middle third. Then grab each side and pull outward, stretching until taut. Fold right side over then left side over the middle. Finally, pull the side furthest away up and fold over then without letting go, use thumbs to fold bottom up and over, making a nice, tight ball. Use dough scraper to shape the ball and further tighten it. Repeat with second ball.
Line two medium-size cast iron saute pans with plastic wrap. Set the first ball top-side down in one of the pans. Cover with another piece of plastic wrap. Repeat with the second ball. Place both pans in the refrigerator for 8-20 hours.
The next day, take one of the pans out of the fridge and set on counter. Put 5-7 quart enameled dutch oven with lid in oven and heat to 500 degrees. After about 25 minutes, remove the plastic wrap from the top of the dough. Take a large sheet of parchment paper (about 16 inches square) and place on top of dough. With one hand on top of the parchment paper, carefully invert the pan and gently slide the dough to the counter. Pull off the other sheet of plastic wrap. With a razor blade or lame cut a pattern (X or square) into the top of the dough. Carefully remove the hot pot from the oven and set the top aside. Grab two corners of the parchment paper with each hand and carefully lower into the hot pot. If you have a water spritzer, give a quick squeeze over the dough and then cover the pot and carefully return the dutch oven to the oven. Immediately turn the oven down to 425 and bake for 25 minutes. Remove the top and bake for another 25 minutes.
When done, gently invert the bread from the pot onto a wire rack, remove the parchment paper and then turn top-side up to cool. Now cover the enameled cast-iron dutch oven, place back in the oven, returning the oven to 500 degrees and bring out the second cast-iron skillet and repeat (you should be able to reuse the parchment paper). Of course, if you have two dutch ovens you can bake both loaves at the same time. Let each loaf cool about 2 hours before slicing (if you can!).
Check out this great video about Tartine Bread.
Tartine Bread from 4SP Films on Vimeo.
Sunday, February 13, 2011
Real Pizza Dough
 |
| Gorgonzola-Pear Pizza |
This is a stripped-down version of Jeff Varasano's pizza dough recipe (http://www.varasanos.com/PizzaRecipe.htm). His recipe is fine, but the description is confusing and hard to follow, so I've removed much of the commentary. Other than minor tweaks, the only change I've made is to remove the commercial yeast. The recipe makes a very wet, sticky dough.
For 2 13-inch pies (each 320 grams):
Ingredients (baker's percentages include the contributions from the starter)
339 grams bread flour (100%)
228 grams filtered water (70%)
64 grams refreshed sourdough starter (poolish) (50% water, 50% flour; 10% of dough weight)
9 grams (kosher) salt (2.5%)
Instructions
- Put 200 grams of water and the starter into the Electolux DLX (link) and mix on high speed for 30 seconds until fully combined. On medium (1/3) speed, slowly add 3/4 of the flour (~250 grams); when fully combined, mix for 1 minute on lowest speed.
- Cover and leave for 20-40 minutes (autolyse).
- Mix remaining water (28 grams) with the salt and add to the mixer. Mix on lowest speed for 6 minutes to knead.
- Slowly add the remaining flour (89 grams) and mix at medium (1/3) speed for 2 minutes.
- Let dough rest for 20 minutes.
- Pour dough out onto marble board; sprinkle flour on top. Using dough scrapper
, cut in half. For each half, flip the dough over and fold to seal the unfloured surface inside. Roll and stretch to make a taught, round ball.
- Lightly oil two 5-cup plastic tubs and place each ball in a tub. Cover and refrigerate 1-6 days.
- Remove dough from refrigerator. Place pizza stone in middle of oven and set oven to highest temperature (550?).
- Prepare pizza toppings.
- After 30 minutes, lightly flour marble board.
- Stretch dough into a circle.
- Move to rice or semolina flour-covered peel and add toppings.
- Transfer to baking stone and bake until done and crust is lightly charred (about 5 minutes, but watch carefully)
Sunday, July 25, 2010
Amaretto-Kahlua Chocolate Chip Cheesecake
This is one of my favorite cheesecake recipes. Having recently acquired a (used) Magic Mill Assistent [sic] DLX-2000 mixer, I thought that it would make a great cheesecake (in addition to its purported excellent bread making capabilities), and it did.

Ingredients
Chocolate Chip Crust
1/2 cup chopped walnuts or almonds [optional]
3/4 cup chocolate chips, chopped into smaller morsels
1 package graham crackers
5 packages amaretti di Saronno cookies [optional]
1/4 cup melted butter
Stock filling
3 packages (8 oz. each) cream cheese, softened
1 tsp. lemon juice
1 1/2 tsp. vanilla
1/2 cup whipping cream
1/2 cup sour cream
3/4 cup sugar
4 whole eggs and 2 egg yolks, slightly beaten
Chocolate Kahlua layer
1 cup chocolate chips
1/4 cup cream
1/4 cup Kahlua liquor
Amaretto layer
1/4 cup Amaretto liquor
Instructions
Chocolate Chip Crust
Heat oven to 325 degrees.
Butter bottom of 10-inch springform pan.
In food processor, mix graham crackers and cookies until there are only large crumbs. Add nuts and chocolate chips and process until there are no large pieces left. Dump out into a medium bowl and sprinkle the melted butter over the crumb mixture. Stir until uniformly moist.
Press crumb mixture evenly into bottom of pan. Bake 10 minutes, then cool.
Filling
Beat cream cheese at medium speed until creamy. Continue beating while adding lemon juice, vanilla, cream, and sour cream, scraping down sides of bowl. [Here's where the DLX-2000 really shined, by doing a great job removing any lumps of cream cheese, without needing to scrape the bowl.] Add sugar slowly while beating. When sugar is absorbed, beat in eggs gradually. When blended, divide into two equal portions. Set aside.
Chocolate Kahlua layer
Heat chocolate chips and cream over low heat until melted (microwave works fine). Add the Kahlua and blend into one of the filling halves.
Pour into pan with chocolate chip crumb crust.
Bake in oven for 25 minutes. The filling should be soft in the center. While the bottom layer is cooking, prepare upper Amaretto layer.
Amaretto Layer
Blend liquor into second half of stock filling.
When lower layer is ready, remove pan from oven and pour Amaretto filling very gently over the still hot lower chocolate layer.
Reduce heat to 300 degrees and bake for 30 minutes or until center of cake is still slightly pudding-like. The center should be 150 degrees when measured with an instant-read thermometer . Do not overcook.
Remove from oven and allow to cool thoroughly in a draft-free place. (I turn off oven and leave in oven for 30 minutes with door slightly ajar to cool slowly; then leave in oven overnight.)
Refrigerate for at least 6 hours before serving.
Eat and enjoy, but remember: it's very, very rich!
Notes: Ideally, you would make this in a water bath, but it's hard to find an outer pan large enough. It would also be a pain to remove the pan part-way through to add the second layer. If you do use a water bath, you either need a waterproof springform pan or a large sheet of heavy-duty aluminum foil to keep the water out of the cheesecake.
Sunday, July 18, 2010
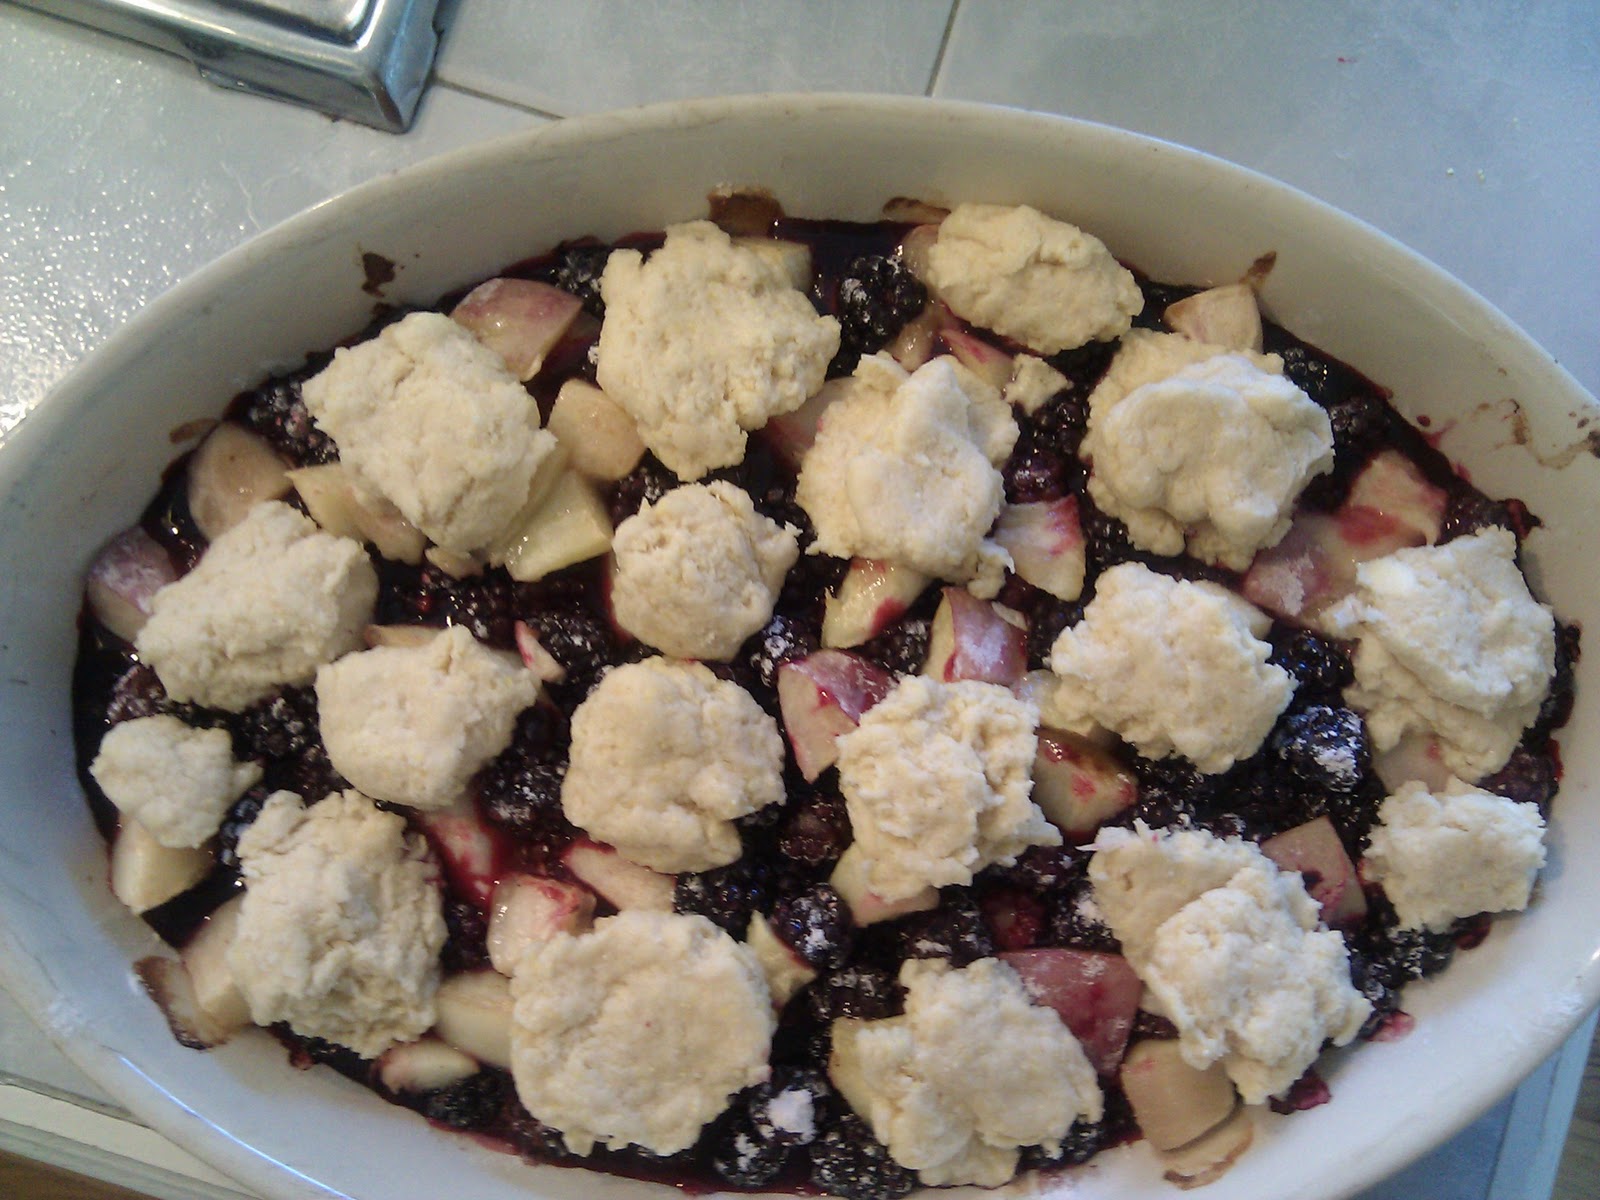
Blackberry Cobbler
I made this twice recently with freshly-picked local berries. Serve with vanilla ice cream.

Filling
1/2 cup sugar
2 tsp. cornstarch
2 tsp. arrowroot
2 tsp. tapioca flour
pinch ground cinnamon
pinch salt
8 cups fresh blackberries
1 1/2 tsp. grated lemon zest plus 1 Tbs. lemon juice
Topping
1 cup unbleached all-purpose flour
2 Tbs. stone-ground cornmeal (or polenta)
1/4 cup sugar
2 tsp. baking powder
1/4 tsp. baking soda
1/4 tsp. salt
4Tbs. (1/2 stick) unsalted butter, melted
1/3 cup buttermilk (or milk with lemon added)
1/2 tsp. vanilla extract
1/8 tsp. ground cinnamon
2 Tbs. coarse or raw sugar
Instructions
Adjust oven rack to lower-middle position and heat oven to 375 degrees. Butter the insides of a large ceramic casserole dish.
For the filling: Stir the sugar, cornstarch, arrowroot, tapioca, cinnamon, and salt together in a small bowl (use about 2 Tbs. of any combination of thickeners). Rinse the berries (I soak them in water and drain several times) and shake gently to dry. Place the berries in the casserole dish, sprinkle on the sugar mixture, lemon zest and juice and mix gently. Bake until the filling is hot and bubbling around the edges, about 25 minutes.
For the topping: Whisk the flour, cornmeal, sugar, baking powder, baking soda, and salt to combine. In a separate large bowl whisk the buttermilk and vanilla. Just before the berries come out of the oven, add the dry ingredients to the buttermilk mixture and stir gently with rubber spatula. Add the melted butter and mix until thoroughly combined.
Remove the berries from the oven; increase oven temperature to 425 degrees. Pinch off walnut-sized pieces of dough, flatten them (about 1/4 inch thick), and place on the hot berry filling, spacing the chunks at least 1/2 inch apart. Sprinkle the dough with raw sugar. Bake until the filling is bubbling and the biscuits are golden brown on top and cooked through, 15 to 18 minutes. Cool the cobbler on a wire rack 20 minutes and serve.
[adapted from Baking Illustrated ]
]
Monday, May 17, 2010
Orange Chicken
Inspired by Ben's Lobster in Orange Sauce
Sauce:
1 1/2 cups fresh orange juice
1 1/2 cups apple cider
juice of 1 lemon
squeeze of kaffir lime juice (optional, of course)
a few slices of kaffir lime peel
2 whole garlic cloves
2 sprigs thyme
To make the sauce, bring all of the ingredients to a boil in a saucepan and then cook on low simmer until syrupy, about 30 minutes. Skim off any foam that rises to the surface. Remove peel, garlic, and thyme.
Chicken:
1 1/2 pounds boneless, skinless chicken thighs (2 packages from Costco)
Remove fat from chicken and cut into bite-sized chunks. Saute in a touch of olive oil. (I used a 12" non-stick saute pan.) When cooked, pour off excess fat. Add salt and pepper to taste.
To serve:
Add sauce to chicken and heat through, coating chicken well. Serve on short-grain rice.
Subscribe to:
Posts (Atom)